Wildflour Pâtisserie
  • French Pastry Recipes
    • Classic
    • Vegan
    • Gluten-free
  • Tips and Techniques
  • Pastry Lab
  • About
  • Contact
Wildflour Pâtisserie
  • French Pastry Recipes
    • Classic
    • Vegan
    • Gluten-free
  • Tips and Techniques
  • Pastry Lab
  • About
  • Contact
Wildflour Pâtisserie
  • French Pastry Recipes
    • Classic
    • Vegan
    • Gluten-free
  • Tips and Techniques
  • Pastry Lab
  • About
  • Contact
Author

Jasmin

Jasmin

French Pastry RecipesGluten-freeVegan

Creamy vegan and gluten-free chocolate cheesecake

by Jasmin October 6, 2024
written by Jasmin

If you’re on the lookout for a decadent, indulgent dessert that’s both vegan and gluten-free, you’re in the right place. My vegan gluten-free chocolate cheesecake recipe is a must-try, combining rich chocolatey goodness with a smooth, creamy texture that melts in your mouth. Whether you have dietary restrictions or just love experimenting with plant-based desserts, this cheesecake is bound to impress.

The best part? You don’t have to sacrifice taste or texture. It’s perfect for family gatherings, special occasions, or when you simply want to treat yourself. Plus, this recipe is free from dairy, eggs, and gluten, making it a deliciously inclusive option for everyone.

With just a few simple ingredients and some time to set, you’ll have a stunning dessert that’s sure to become a favourite!

Vegan gluten-free chocolate cheesecake

How to make vegan cheesecake

When making a vegan cheesecake, silken tofu is often the star ingredient due to its smooth, creamy texture, which blends effortlessly into the filling. Unlike firm or extra-firm tofu, which holds its shape and is commonly used in stir-fries or savory dishes, silken tofu is much softer and has a high water content, giving it a custard-like consistency. This makes it ideal for desserts like cheesecakes, as it creates a velvety, rich base without the need for dairy. Its neutral flavor allows it to take on the sweetness and other flavors of the recipe, resulting in a perfectly luscious cheesecake.


Vegan gluten-free chocolate cheesecake

Creamy vegan and gluten-free chocolate cheesecake

Try this easy to follow recipe for a delicious creamy chocolate cheesecake that is both vegan and gluten-free!
Print Recipe
Prep Time 30 minutes mins
Cook Time 1 hour hr
Course Dessert
Servings 8 pieces

Ingredients
 

Cheesecake Base

  • 110 g Gluten-free oats
  • 35 g Desiccated coconut
  • 45 g Icing sugar
  • 2 g Salt
  • 60 g Coconut oil soft
  • 10 g Cocoa powder

Cheesecake Filling

  • 600 g Silken tofu
  • 30 g Cocoa Powder
  • 100 g Dark vegan chocolate melted
  • 120 g Sugar
  • 40 g Corn starch

Instructions
 

Cheesecake Base

  • In a food processor, mix the 110 g gluten-free oats until you get fine meal.
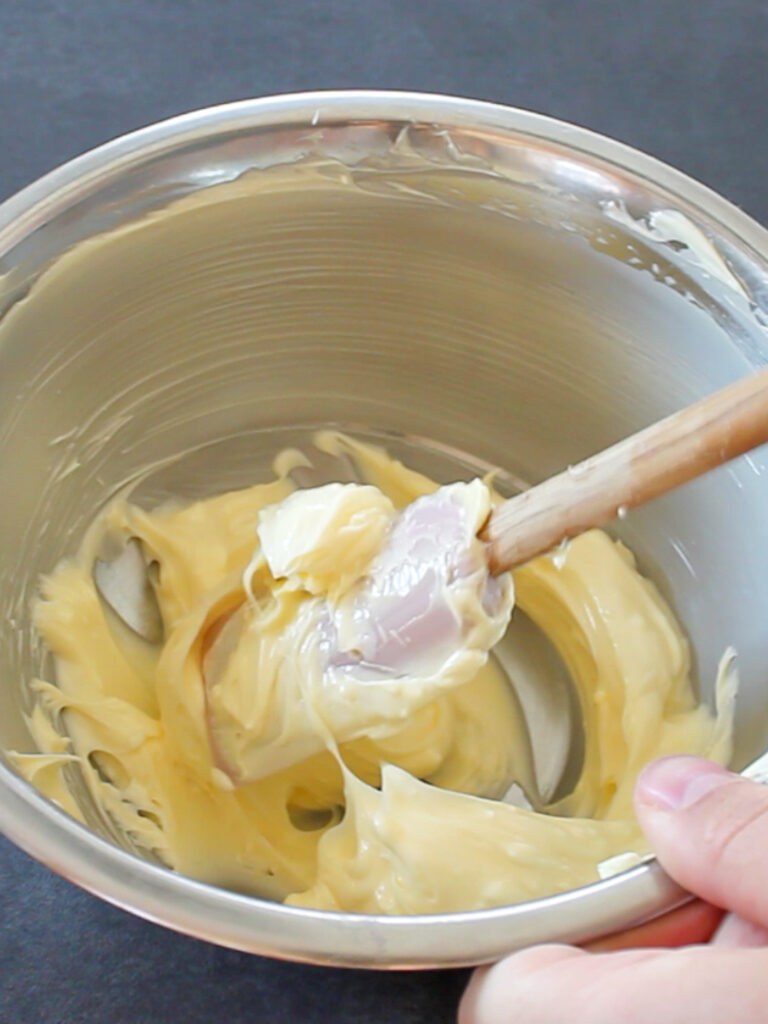
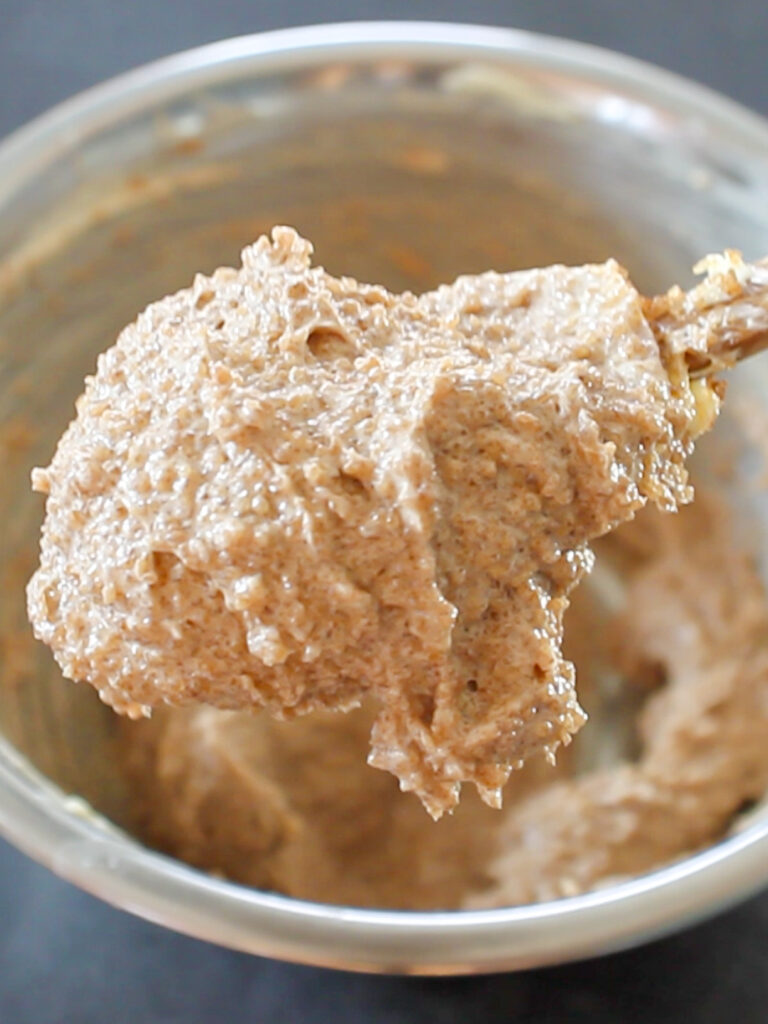
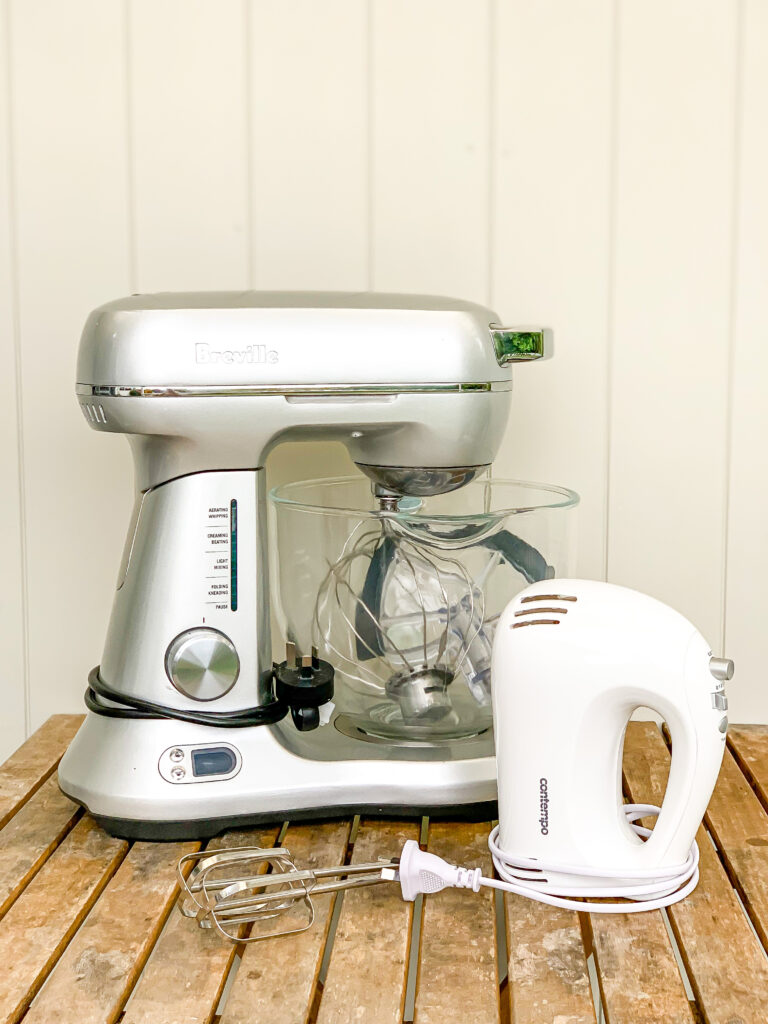
  • In a bowl, combine the oatmeal, the 35 g desiccated coconut, 45 g icing sugar, 2 g salt, 60 g soft coconut oil and 10 g of cocoa powder. If you have a stand mixer, use the paddle attachment und keep it mixing until you get a homogenous dough. If you don't have a stand mixer, I recommend you use a wooden spoon to roughly mix everything together and then use your hands to combine all the ingredients until homogenous.
  • Put the dough into a 15 cm cake ring or springform. Press the dough flat to create a base and also around the inside of the cake ring. I like having a tall cake, so I put the dough up to 6 cm inside the cake ring.
  • If your dough keeps sliding down the walls, place it in the freezer for a few minutes and then try to keep pushing the dough walls a bit higher again.
  • If heat is a problem, keep the prepared base in the fridge or freezer until you're ready to fill it with the cheesecake filling.

Cheesecake Filling

  • Preheat the oven to 170°C.
  • Melt the 100 g of chocolate in a metallic bowl over hot water (Bain-marie). Set aside to cool off. Check that the chocolate remains liquid though.
  • In a blender, mix the 600 g silken tofu and 30 g cocoa powder until it is smooth and silky.
  • Pour a little bit of the silken tofu/cocoa mix into the melted chocolate and stir vigorously. This part is important to avoid having crystallised chocolate lumps in the cake - we want it to me creamy! Keep on adding a little bit of the silken tofu to the chocolate mix until its texture has become more or less similar to the texture of the silken tofu/cocoa mix.
  • Now pour in the rest of the silken tofu.
  • Add 120 g of sugar and 40 g of sifted corn starch to the mix and stir until everything is well incorporated.
  • Your filling is done! Pour it on top of the prepared cheesecake base. It should ideally not go higher than the dough goes up on the walls. If it is don't worry - the cake will still work! But you will need to be more careful when removing the cake ring or springform after baking.
  • Bake at 170°C for approximately one hour. Check if it's done by opening the oven door and (using a kitchen towel!) slightly move the cake ring. It is done when the middle is still a little bit wobbly.
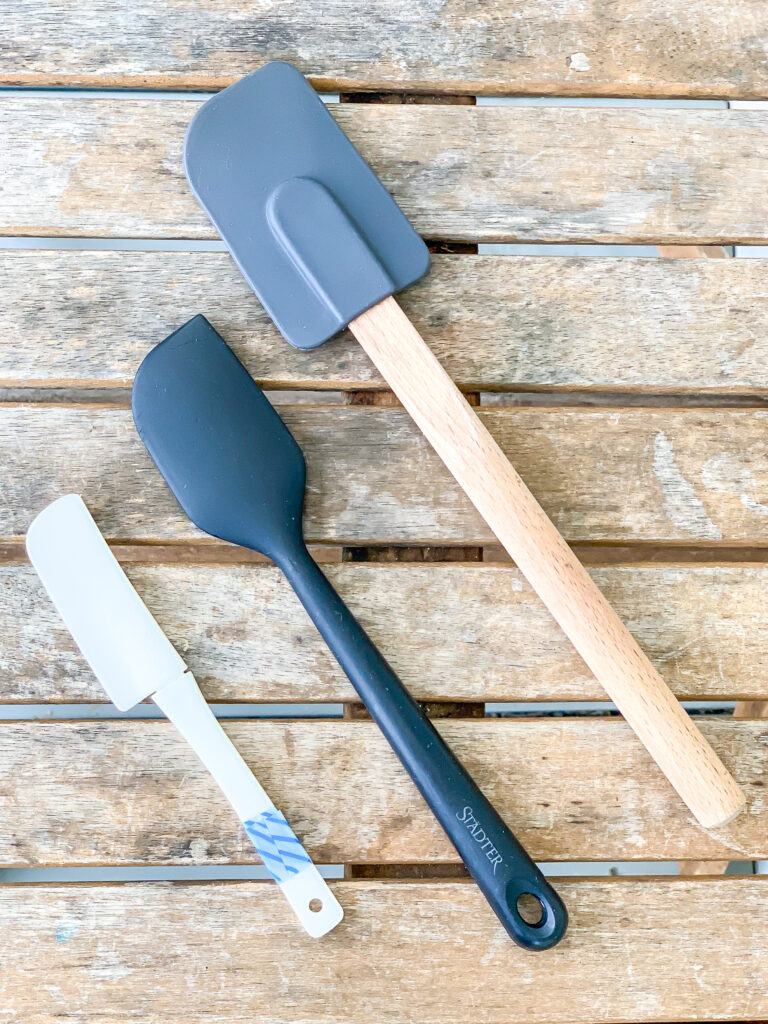
  • Let the cake cool for 20-30 minutes. Then remove the cake ring. Before lifting the ring or opening the springform make sure you pass a small spatula or a flexible knife between the cake and the cake ring to remove any cake that might be sticking to the ring. This is especially important if your filling is touching the cake ring directly.
  • Let the cheesecake cool down entirely, whip up some (vegan) whipping cream and enjoy!
Keyword vegan gluten-free chocolate cheesecake
0 FacebookTwitterPinterestThreadsBlueskyEmail
Egg-free Levain-style Cookie
Classic

Egg-free Levain-style Cookies Recipe

by Jasmin August 21, 2024
written by Jasmin

Living on an island has its fair share of pros and cons. One of the more unexpected challenges I faced when I first moved here was a complete shortage of eggs. Yes, you heard that right – the entire island was out of eggs!

As someone who loves to bake, I found myself in a bit of a predicament. But rather than letting this setback dampen my spirits, I saw it as an opportunity to get creative in the kitchen. The result? A recipe for egg-free Levain-style cookies that are just as delicious than their traditional counterparts.

Egg-free Levain-style Cookie

After many rounds of testing, tweaking, and perfecting, I’m excited to share this recipe with you. These cookies are everything you want them to be – thick, chewy, and packed with flavour. Plus, they’re incredibly easy to make and adaptable to fit both vegan and gluten-free diets. Whether you’re out of eggs like I was or simply looking for a new twist on a classic favourite, this recipe has you covered.

Ready to get baking? Check below to dive into the full recipe or watch the video and experience the joy of homemade, egg-free Levain-style cookies. Trust me, you won’t miss the eggs!

Egg-free Levain-style Cookie inside

Egg-free Levain-style Cookies

This is an easy to follow recipe to make big chunky Levain-style cookies at home! These are egg-free which means they can be adapted to a vegan diet by simply replacing the milk with a plant-based alternative.
Print Recipe Pin Recipe
Prep Time 20 minutes mins
Cook Time 18 minutes mins
Resting time (freezer) 3 hours hrs
Course Dessert, Snack
Cuisine American
Servings 7 Cookies

Ingredients
 

Cookie Dough

  • 180 g Butter softened
  • 100 g White Sugar
  • 150 g Brown Sugar
  • 2 g Salt a pinch
  • 55 g Milk
  • 260 g Flour
  • 13 g Baking Powder
  • 70 g Walnuts chopped into chunks
  • 140 g Dark Chocolate chopped into chunks

Decoration

  • 100 g Chocolate Spread or Nut Butter

Instructions
 

Making the Cookie Dough

  • Start by measuring 180 g of butter. Cut it into small cubes so it softens faster.
  • In the meantime, prepare all the other ingredients. Chop 140 g of chocolate and 70 g of walnuts into big chunks.
  • Once the butter is soft (see the video for this step if you're unsure), place it in a bowl together with 100 g white sugar, 150 g brown sugar and a pinch of salt (2 g). Cream the ingredients together until the colour of the butter has lightened and everything is well incorporated.
  • Add 55 g of milk or your plant-based alternative if you're making vegan cookies. Mix everything together. If the liquid is a lot colder than the butter-sugar mix, the dough might lose its homogeneity. Don't worry - adding the flour and baking powder in the next step should solve the issue.
  • Mix together 160 g flour and 13 g of baking powder and give it a stir. Add these powders into the dough. Important: Only mix in the flour until it is fully incorporated into the dough, then stop mixing.
  • Add around 2/3 of the chocolate chunks and 2/3 of the walnuts chunks into the batter. Give it a quick mix. Set aside the remaining chocolate and walnuts for decoration.
  • Divide the batter into seven balls of 120 g each. If there is any batter left, then place a bit on top of each ball. Ensure they are all the same size.
  • Place the dough balls in the freezer for minimum 3 hours, you can also fully freeze them and take them out once you're ready to bake them.

Baking and Shaping the Cookies

  • Preheat the oven to 180°C or 360 ° F.
  • Place the frozen cookies on a baking tray lined with parchment paper or a silicone baking mat. Ensure they are spread out as they will flatten while baking.
  • Bake for 18-20 minutes in the middle of the oven.
  • Once they're golden on the surface, take them out of the oven. Optional: If you want the cookies to be round and less flat, use a cookie cutter slightly bigger than the cookie and shape it in circular movements.
  • Let the cookies cool down completely.

Decorating

  • Fill your favourite chocolate spread or nut butter into a piping bag. Cut of the tip and place several dollops on top of each cookie.
  • Finish the cookies by sprinkling some chocolate and walnut chunks onto each cookie.
  • Enjoy!
Keyword egg-free Cookies
0 FacebookTwitterPinterestThreadsBlueskyEmail
Vegan Apple Cinnamon Rolls
French Pastry RecipesVegan

Vegan Puff Pastry Apple Cinnamon Rolls Recipe

by Jasmin April 25, 2024
written by Jasmin

One of my favourite things I learnt at Pastry School was how to make puff pastry. Once you know how to do it, the fun starts and you can get creative with it! This variation is perfect for cosy autumn and winter days. Just imagine warm and fluffy vegan apple cinnamon rolls with just the right amount of cinnamon, some icing on top and a hot cup of tea.

Vegan Apple Cinnamon Roll

This is a great recipe for you to try making puff pastry yourself! Unlike croissants it really doesn’t need to be perfect. On the contrary we want it to be a bit messy and rustic.

Of course you can also make this recipe using store-bought puff pastry. But if you want to make sure it’s vegan or are tempted to try making it yourself, you should give this recipe a try! 

I promise, these vegan Apple Cinnamon Rolls filled with soft apples mixed with brown sugar and icing on top will be delicious!

As always, if you have any questions or if instructions are unclear, don’t hesitate to leave a comment below. I’m here to help and don’t forget, others might benefit from it as well 🙂

Vegan Apple Cinnamon Roll

Let’s take a closer look

This recipe for puff pastry vegan apple cinnamon rolls consists of four components:

  • Homemade vegan Puff Pastry
  • Our delicious Apple Cinnamon Filling
  • Icing to drip onto our finished Cinnamon Rolls

Everything you need to know to nail these perfect vegan Apple Cinnamon Rolls!

Vegan Puff Pastry

  • 150 g T45 flour
  • 150 g T55 flour
  • 6 g salt
  • 45 g sugar
  • 15 g yeast or 5 g dried yeast
  • 145 g vegan milk
  • 60 g vegan butter
  • 150 g vegan butter of a percentage of 82% fat

Or use store-bought (vegan) puff pastry.

For this recipe, we will mix T45 and T55 flour. If you can’t get your hands on that kind of flour, bread flour (which has a higher gluten content) or all purpose flour will work as well. Further, we’ll use regular salt and white sugar. As for the yeast, I prefer using fresh yeast. However, this recipe also works with dry yeast, which you can substitute using a 3:1 ratio. Don’t worry, I listed both options for you.

Now you might wonder if making vegan puff pastry is a lot more complicated than normal puff pastry. But it’s actually not!

All you have to do is replace normal milk using your favourite plant-based milk and the normal butter with vegan butter. Make sure to get vegan butter with a percentage of 82% fat. Otherwise it will be more complicated to get beautiful layers as the butter will melt quicker. Make sure you do not use margarine that is labelled as “extra soft” or “extra spreadable” – these are so soft that it’ll be very tricky to get beautiful layers of butter and dough.

How to make your own vegan puff pastry

To start, add the T45 flour, T55 flour, salt, sugar, yeast, vegan milk and the first amount of butter to your mixing bowl. We want our dough to be cold in the beginning as it will heat up while we’re mixing. So make sure, that your plant-based milk and your butter are cold! Mix for 3 minutes on low speed to combine your ingredients. After, keep on mixing for 7-9 minutes on medium speed. Stop the machine when you can easily stretch your dough and you have a beautiful glutinous net.

In my giphy below you can see how easily I can stretch the dough – it almost gets transparent and you can see my fingers through it without the dough breaking. That’s what we want! So be patient and give your stand mixer some time.

https://giphy.com/gifs/XN59FUTt6Zj1T38cgD

Now, shape your dough into a ball, cover it with cling film and let it sit at room temperature for 35-45 minutes. During that time it should rise visibly, but keep an eye on it – we also don’t want it to rise too much. 

In the meantime, prepare a 15 x 30 cm (6” x 12”) rectangle out of parchment paper. 

While you’re still waiting, you can also already prepare another 15 x 15 cm (6” x 6”) rectangle, also out of parchment paper. Place your second (the bigger) amount of butter on it, close it and roll the butter into all the corners using a rolling pin. It should be as even as possible. After, pop the butter back in the fridge.

Once your dough has risen, remove the air from your dough by flattening your ball. Place it onto your 15 x 30 cm (6” x 12”) parchment paper rectangle, close it and move it into all the corners using a rolling pin. Again, your dough rectangle should be as even as possible. Place in the freezer for 10 minutes.

How to organise yourself: If you want to make your apple cinnamon rolls over two days, you can prepare your dough one the first day. For this, make your dough as mentioned above. Instead of letting it sit at room temperature for 40-45 minutes only let it develop for 10 minutes. After that, shape the dough into your rectangle. Place it in the freezer for 15-20 minutes and leave it in the fridge overnight. Then continue exactly as outlined below.

Dough and butter for puff pastry

Creating those beautiful puff pastry layers

If you are new to puff pastry or are still unsure about how to proceed, I recommend you watch my video. Seeing what I am doing will make it a lot easier for you to understand the next steps!

Image gallery image
Image gallery image
2

Now, take out your dough and your butter. Make sure both have the same texture. For the butter, this means that you should be able to hold it in your hands and bend it a little bit. It should not break (if it does it’s to cold) and it also shouldn’t be melting in your hands. Place your butter rectangle on one of the sides of your dough rectangle. Then, using a knife, cut your dough in the middle. Place the other half of your dough on top of the butter. You now have a square sandwich of dough – butter – dough.

Image gallery image
Image gallery image
Image gallery image

Before you start rolling your dough, place your rolling pin on top of your sandwich and create some waves. For this you apply some gentle pressure onto your rolling pin. Create waves as shown in the image. If it feels very hard and you have to apply a lot of pressure for the dough to create the waves I recommend you let your sandwich sit at room temperature for a little longer.

Now start rolling. I like to always start rolling from the middle. So you start rolling from the middle towards you for 2-3 times, then you roll from the middle away from you for 2-3 times. This ensures you roll your dough out evenly. Keep on rolling until your dough reaches a length of around 60 cm (24”).

If your dough or your butter is too cold: If you have to force it, because your dough won’t move, you will quite likely break the butter. This means you will end up having lots of small butter pieces instead of the desired one thin layer of butter. Even if this happens to you, don’t panic! I have been there and you will still get nice cinnamon rolls in the end. This only really gets problematic for croissants, because that’s when we want everything to be perfect.

If your dough or your butter is too warm: This is the case if you have troubles rolling out your dough. You roll and you roll but it doesn’t get longer but instead it only keeps retracting. This means that your sandwich needs to rest. Simply place it in the freezer for 5 minutes and try again!

Image gallery image
Image gallery image

Once your dough is rolled out, we will first be doing a double fold. For this, cut the side closest to you with a knife. Then, using a pastry brush, remove the excess flour on top of your dough. Now, fold around 1/8 of your dough from the bottom towards the middle.

Why should I remove the excess flour? If you do not remove the excess flour on top of your dough before folding, your layers of dough might not stick together sufficiently. As a result, when you roll out your dough again after folding, the different layers may move instead of staying perfectly stacked on top of each other.
Another reason to remove excess flour is that you will be adding more flour to your dough. This can slightly dry out your final result.

Image gallery image
Image gallery image
Image gallery image

To finish the double fold, take the upper end of your dough and fold it towards you. To fill the gaps, cut smaller pieces of the dough you cut off before. Place them in the gaps. Lastly, fold the dough over. For this, pick up the dough in front of you and fold it over to the upper edge. If your dough is still nice and cold you can continue with the following single fold straight away. In case it’s getting too warm, place it in the freezer for 5-10 minutes and continue after. And, when in doubt, I recommend popping it in the freezer for a little bit. 🙂

Is it really necessary to fill the gaps? Well probably every pastry chef has their own opinion on this. Alternatively you can also stretch your dough a bit to fill the gaps. But this is only possible if your gaps are rather small. By stretching the dough too much in one spot you might end up having slightly irregular layers overall.
Theoretically, you could also cut off the irregular dough on both sides. With this method you get it perfectly, but you will also waste a lot of dough.

Image gallery image
Image gallery image
Image gallery image

Once you’re ready to do your single fold, place your dough in front of you. Using a knife, cut open the closed sides on the right and the left of your dough. Then follow the same steps as above: Flatten your dough by making waves, then roll it to around 40 cm (16”) length. Again, pay attention to the temperature of your dough (see above). Once you reached the right length, remove any excess flour with a brush.

Image gallery image
Image gallery image
Image gallery image

This time only a so called single fold is required. If you risk having big dough gaps, cut off some dough like you did in the step before. Then, take one third from the bottom of your dough and fold it over. Now take the upper third of the dough and fold it down.
Again, cut the two closed edges open using a knife. Place your dough back in the fridge for at least one hour as it will need to rest.

Apple Cinnamon Filling

  • 2-3 apples
  • 70 g vegan butter 
  • 100 g brown sugar
  • 1 teaspoons of cinnamon
  • 1/2 vanilla bean

I know puff pastry is tricky! But this step is easy: Peel your apples, cut them into small cubes and place them in a bowl. Scrape 1/2 vanilla bean and add to the apples. Slightly heat the butter in the microwave until soft (not liquid!), add the sugar and cinnamon and mix everything well. You will get a creamy mixture. Keep the butter-mix and your apples at room temperature. And that’s it!

Curious about vanilla? Hop over here to learn everything I discovered when visiting a vanilla farmer in Bali!

Image gallery image
Image gallery image
Image gallery image
Screenshot

Let’s fill these beauties!

Now that the two most important parts are done, we will combine them both.

For this, roll out your puff pastry to a rectangle of 30 x 40 cm (12” x 16”). It’s important that your dough had enough rest or it will be too elastic and difficult to roll out.

Image gallery image
Image gallery image

Now, spread the butter-sugar-cinnamon mix on top of your dough. Make sure you spare one centimetre on one side. That’s where we will close our roll. For the other sides you can be generous and go until the edges.

After, place your apples on top. Make sure to spread them evenly.

Image gallery image
Image gallery image
Image gallery image
Screenshot

Start rolling on the opposite side from where you left the 1 cm border. Roll it tightly but gently. Once you reach the end, take some water and apply it onto the 1 cm (0.5”) border. Now roll until the end.

After that, this final step will help to tighten the roll. Again, watching the video will make it easier to understand what you need to do. Otherwise, I hope the images help as well. You need your cinnamon roll, parchment paper and I used a ruler. You can also use your rolling pin.

For this, place your roll in the middle of parchment paper. Cover it with parchment paper and place a ruler or a rolling pin close to your roll. With the other hand, pull the bottom layer of parchment paper towards you. This helps tighten your cinnamon roll. Then, cover it entirely in parchment paper and place it in the freezer for 5-10 minutes.

Image gallery image
Image gallery image
Image gallery image
Screenshot

It’s time for vegan Apple Cinnamon Rolls!

We’re almost there! Now that your apple cinnamon roll is nice and cold, you can cut it a lot easier.

Using a bread knife, cut the off pieces of 2,5 cm (1”). You should get 12 little rolls out of it. Place them on two trays with parchment paper. Let them rise at room temperature for 2-2.5 hours.  

Once your cinnamon rolls are done proofing bake them for 20 minutes at 160° C (320°F).

Image gallery image
Image gallery image
Image gallery image

Freezing your vegan Apple Cinnamon Rolls: Don’t need 12 cinnamon rolls at once? You can either place half of them in the freezer before proofing them or once they’re baked. Thaw them in the fridge overnight and let them rise for 2-2.5 hours the next day if they haven’t yet risen. Then bake for 20 minutes at 160° C (320°F). If they were already baked, simply warm them up at 80°C (180°F) for 5-10 minutes.

Let’s finish with some icing!

Icing

  • 250 g icing sugar
  • lemon juice or water

While your cinnamon rolls are in the oven, place the icing sugar in a bowl, add a small (!) quantity of water or lemon juice and mix. Continue until you reach the desired consistency.

By now your kitchen will smell amazing. Take your cinnamon rolls out of the oven and let them cool down a bit. Then add some of the icing on top and enjoy!

https://giphy.com/gifs/c45C6WbRK4a4ql69aF

As you might imagine you can fill these rolls with anything you like. In France they are traditionally filled with raisins soaked in rum and pastry cream (called pains aux raisins). You can also do pastry cream and chocolate drops for example. It also doesn’t have to be rolled, you can give your puff pastry any form you like. Why not go for a croissant shape with some of the filling inside? 

Whatever you decide to do with this recipe, I hope you enjoy it and create some happiness for you and the people around you. That’s what’s most important!

Also, feel free to share your result with me by simply tagging me @wildflour__patisserie on instagram or leave a comment below.

Vegan Apple Cinnamon Roll

Vegan Puff Pastry Apple Cinnamon Rolls

Recipe for fluffy vegan apple cinnamon rolls made out of homemade puff pastry, just the right amount of cinnamon and some icing on top.
Print Recipe
Pin Recipe

Prep Time 2 hours hrs
Resting Time 5 hours hrs

Servings 12 pieces

Ingredients


Puff Pastry

  • 150 g T45 flour
  • 150 g T55 flour
  • 6 g salt
  • 45 g sugar
  • 15 g fresh yeast or 5 g dried yeast
  • 145 g vegan milk (soy milk)
  • 60 g vegan butter
  • 150 g vegan butter, 82% fat

Apple Cinnamon Filling

  • 2-3 apples
  • 70 g vegan butter
  • 100 g brown sugar
  • 1 teaspoon cinnamon
  • 1/2 vanilla bean

Icing

  • 250 g icing sugar
  • lemon juice/water

Instructions


Puff Pastry

  • Add the T45 flour, T55 flour, salt, sugar, yeast, vegan milk and the first amount of butter (60 g) into your mixing bowl.
  • Mix for 3 minutes on low speed to combine your ingredients. After, keep on mixing for 7-9 minutes on medium speed. Stop the machine when you can easily stretch your dough and you have a beautiful glutinous net.
  • Shape your dough into a ball, cover it with cling film and let it sit at room temperature for 35-45 minutes.
  • Take a piece of parchment paper and fold it into a 15 x 30 cm (6'' x 12'') rectangle. Also prepare a 15 x 15 cm (6'' x 6'') rectangle out of parchment paper as well. Have a look the video or the photos above to understand better that step.
  • Now, take the second amount of vegan butter (150 g) and place it inside your 15 x 15 cm (6'' x 6'') parchment paper rectangle. Close it and roll the butter into all the corners. Your butter might have to soften a bit before. Once this step is done, put the butter back in the fridge
  • Once your dough has risen, place it inside your 15 x 30 cm (6'' x 12'') parchment paper rectangle. Now flatten it by pressing it down with your hands. You want to remove all the air that is inside of your dough.

    Then close your rectangle and push your dough into all the corners. You want this to be as even as possible. At this step, don't worry if the dough doesn't stay perfectly in the corners. After, place the dough into the freezer for 10 minutes.

  • Take out the chilled dough and the butter. If necessary, roll the dough into the corners.

    Place the dough rectangle in front of you. Place your butter rectangle on one of the sides of your dough rectangle. Then, using a knife, cut your dough in the middle. Place the other half of your dough on top of the butter. You now have a square sandwich of dough – butter – dough.

  • Roll out your dough to a length of around 60 cm (24''). Remove any excess flour on top of your dough and do a double fold. If you are unfamiliar with this step, check out my video or the description above.
  • Put your puff pastry in the freezer for 5-10 minutes.
  • Then, cut open the two folded sides of your dough. These should be left and right of you, meaning that one of the open sides is facing you (see image 14).

    Roll out your dough to around 40 cm (16''), then do a single fold. Now, put the dough into the fridge for at least one hour for it to relax.

  • Prepare the Apple Cinnamon Filling in the meantime.

Apple Cinnamon Filling

  • Slightly heat the butter in the microwave until soft. Add the sugar and cinnamon and mix everything well.
  • Peel your apples, cut them into small cubes and place them in a bowl. Scrape 1/2 vanilla bean and add to the apples.

Assembling, proofing and baking the vegan Apple Cinnamon Rolls

  • For the next step, roll out the puff pastry to a 30 x 40 cm (12'' x 16'') rectangle.
  • Spread the soft butter mixture on top of the puff pastry. Make sure you spare one centimetre on one side.

    After, place the apples on top.

  • Start rolling on the opposite side from where you left the 1 cm (0.5'') border. Roll it tightly but gently. Once you reach the end, take some water and apply it onto the 1 cm border. Now roll until the end.
  • Tighten the roll as shown in the video and images above. Freeze for 5-10 minutes.
  • Using a bread knife, cut the off pieces of 2,5 cm (1''). You should get 12 little rolls out of it. Place them on two trays with parchment paper. Let them rise at room temperature for 2-2.5 hours.  
  • Once your cinnamon rolls are done proofing bake them for 20 minutes at 160° C (320°F). Take them out of the oven once their golden.

Icing

  • Place the icing sugar in a bowl and add a small quantity of water or lemon juice and stir. Continue until you reach the desired consistency.
  • Drip the icing over your rolls and enjoy!

Keyword vegan puff pastry apple cinnamon rolls, vegan puff pastry recipe
0 FacebookTwitterPinterestThreadsBlueskyEmail
Tips and Techniques

My top 10 baking and pastry tools you need for French Pâtisserie

by Jasmin April 23, 2024
written by Jasmin

You are just starting your French Pâtisserie journey? You see all these fancy pastries and wonder which pastry tools you need to get started? Maybe you have no idea what is worth investing in at this point?

To make things easier for you I have listed below my Top 10 Baking and Pastry Tools I use and love the most. Most of them are rather basic and you might already have them in your kitchen. Every listed tool also comes with an explanation what it is mostly used for. I also added in which case it would make sense for you to invest in that tool.

At the end of the page, you will further find my favourite online shops for pastry tools and equipment.

You’re ready? Let’s dive into my favourite pastry tools!

1. An electronic Kitchen Scale

Yes, I admit that this seems pretty basic. But I cannot imagine baking without it. Maybe it already happened to you that your recipe didn’t turn out the way you wanted it to be? That might be because you didn’t weigh correctly. This is something that can be avoided so easily. By weighing using an electronic kitchen scale you have one less thing to worry about.

Who is this tool for? Anyone really!

electronic kitchen scale

2. An electronic Precision Scale 

Never saw a micro scale? Nor did I before I went to Pastry School. There I learnt pretty fast how amazing it is to have one. Let’s take my recipe for Apple cinnamon Rolls, here you need to weigh 2 g of salt for the puff pastry. A normal kitchen scale often doesn’t weigh that precisely, making it hard to add the right amount. And it would be a bummer if your puff pastry didn’t turn out the way it should’ve because you added too much salt.

Tip: You do not want to get a micro scale at the moment, but want to weigh as precisely as possible? Then don’t tare your kitchen scale before adding the “micro ingredient”. Sometimes, kitchen scales react slower if they are set to zero.

Extra Tip: If this still doesn’t work for you, weigh the smallest amount that your kitchen scale detects into a small bowl. For example, your scale measures 3 g, but you only need 1 g. Then you simply divide by eye and only use 1/3 for your recipe.

Who is this tool for? Anyone who wants to work as precisely as possible. Don’t forget, weighing the right amount is the basis for the success of your recipe!

electronic precision scale

3. Bowls, Bowls and more Bowls

I don’t think you can ever have too many bowls. I’m sure you noticed that you can use an endless amount of them when making some more complex recipes! They are one of your best and most important friends when baking and help you stay organised. Say goodbye to constantly washing dishes because you need “just one more bowl”.

Who is this tool for? I think we all can use them!

4. A Hand or Stand Mixer

Anyone who ever tried to get stiff egg whites using a hand whisk knows how valuable a hand or a stand mixer is. If you don’t have any of it, I would recommend you to start with a regular hand mixer. I’ve used some cheap ones in my life and really, they do the job. Portable or not, that’s up to your preferences.

But how do you know if you should upgrade to a stand mixer? Let me just say that I got my beautiful, loved pistachio green Kitchenaid over 8 years ago. And I never ever regretted it because I knew that I will be baking my entire life and that I will eventually get a stand mixer.
Now you might say that it was an obvious choice for me – but back then I had just started studying sports and it took me another 7 years to switch to pastry professionally! You know yourself best. If you feel like you want to advance in French pastry, want to work more efficiently, faster and cleaner, then a stand mixer might be the right decision for you.

Who is this tool for? I really recommend getting some sort of mixer, it makes your life so much easier.

hand and stand mixer for pastry

5. A Dough Scraper

You took all that time to precisely weigh your ingredients, followed precisely the recipe and got your perfect dough, mousse or cream – don’t let anything go to waste. A dough scraper is cheap to get and ensures that you get all of the deliciousness!

Who is this tool for? I think it’s an essential pastry tool for every baker, you can get them cheaply in any baking store but often also supermarkets have them.

three different sizes of dough scrapers

6. A small Spatula

My small spatula is my favourite tool. I use it all the time. Unfortunately I cannot always take my Kitchenaid with me but believe me, my small spatula never leaves me. Seems weird? I guess it is.
Now you might wonder what I’m using it for. Especially for making entremets, a small spatula comes in handy. Whether it is for spreading a croustillant or a mousse inside a mould, a small spatula is the tool I use. It is also good to have for smaller cakes like tartlets e. g. to take off excess filling.

Tip: In some cases a small spatula can be replaced by a spoon. But as soon as you want to smoothen surfaces (think of the tartlet above) a spatula will do a much better job!

Who is this tool for? You want to have perfectly smooth surfaces for your small cakes? Then this tool is for you.

small pastry spatula

7. A big Spatula

This tool is the big brother of the small spatula. Anyone who does buttercream cakes probably already has one. In French Pastry, it is used to spread doughs evenly on a baking tray, to assembly an entremets, to take off excess glaze or to temper chocolate. You can get straight and curved spatulas, I personally prefer the curved one. This ensures some distance between your hand and what you’re working with. So no dough or mousse on your fingers, yay!

Who is this tool for? For French pastry, it is a bit more of an advanced tool I would say. But especially if you want to make entremets I recommend it.

big pastry spatula

8. A Rolling Pin

This tool is not only useful to make more elaborated pastries like croissants or pain au chocolat. A rolling pin is also handy to have when you roll out your dough to make tartlet shells or to place some craquelin on top of your éclairs.
If you don’t already have one, I would recommend getting a French-style one. These are flat and don’t have handles, which makes it easier to apply pressure evenly.

Tip: If you go for a French-Style rollin pin you might consider getting one with silicone rings. These (in theory) allow you to easily roll out your dough at the chosen height. I think they’re great for starting out as you might not (yet) have a feeling for the height of 3mm of dough.

Extra Tip: If you don’t have a rolling pin but need one, look around the house. Maybe there is a different object that you could use instead? I did this before as I sometimes bake in the most random places. When baking at home I always prefer my French rolling pin though.

Who is this tool for? Want to roll out your dough evenly? Then you have your answer 🙂

rolling pins

9. A Balloon Whisk

Whisks are a useful pastry tool to just quickly mix ingredients. I use them in situations where there is no need to get out the hand or stand mixer. Either because it’s just a quick stir, or because the hand mixer is too powerful even on lowest speed. Plus: it might save you from washing another bowl in the end of the day.

Who is this tool for? Even if you do not use it often, it is good for everyone to have at least one.

balloon whisk

10. Digital Probe Thermometer

Ok, until here nothing seemed too unfamiliar or surprising right? Now let’s get a bit more specific! I could talk a lot about thermometers (I have three different ones!) but I believe that a digital probe thermometer is the best to start with. 

Let’s take a recipe for Crème Anglaise, which is the base for a couple of French-style creams. Here, you need to heat your mixture to 83° C. If you don’t heat it enough your cream will be too runny and not stable enough. And if you heat it too much, the egg inside your mixture will cook too much, creating some sort of omelette. So both cases are not ideal.

It is possible to see by eye when your mixture has reached the right temperature, but if you don’t want to worry about that – get a thermometer with a probe and you’re safe. 

Tip: For some of the thermometers you can even set a desired temperature. Once the temperature is reached, it’ll beep which can be really handy.

Who is this tool for? For anyone who feels ready to start recipes that need some more precision. 

Digital probe thermometer

Where to find these pastry tools

You can find a lot of these items in stores, but in case you prefer online shops, I linked below my favourite ones for French Pâtisserie equipment!

  • Meilleur du Chef (within Europe or reach out to them for other destinations)
  • Cardin Deko (within Europe)
  • Pastry Chef’s Boutique (US, Canada, Mexico – please note that I have no personal experience here)

Some of these pastry tools made you curious or you’d be interested in knowing more about my two other thermometers? Drop a comment below and let me know, I might just do another blogpost on my favourite tools for more advanced pastries!

0 FacebookTwitterPinterestThreadsBlueskyEmail
Bali Vanilla Farmer produce
Pastry Lab

Bali Beans: The Secrets of Bali’s Vanilla Farmers

by Jasmin April 23, 2024
written by Jasmin

During my stay in Bali I mostly spent the days driving through rice fields on our scooter, admiring the beauty of the island and on the lookout for the next Nasi Goreng. But luckily I also knew that both cocoa and vanilla are being grown on the island. As I had already had the chance to visit a cocoa plantation in Côte d’Ivoire, I thought that it was time to see how vanilla grows. But don’t worry, I did not forget about cocoa and also went to visit a local chocolate factory in Bali.

We visited Gustu, a Balinese traditional vanilla farmer. He invited us to his family’s house, where we spent a good amount of time asking loads of questions. Though I had learnt the basics about vanilla during my time at Pastry School in France, my actual knowledge was pretty limited. Later on, Gustu took us to one of his plantations so we could see how vanilla grows.

Bali Vanilla Farmer produce

The vanilla plant is an orchid, that uses trees or tree trunks to climb up. It can get as high as 20 m and produces the first flowers at an age of 2-3 years. It is one of the most expensive spices in the world and can only be grown in specific tropical countries, such as Madagascar, Réunion, Indonesia or Mexico. It is mostly commonly used in pastries but als in perfumes and cosmetics.

Vanilla beans hanging from a vanilla plant

About Gustu’s Vanilla Farm in Bali

Gustu’s vanilla farm is located in Kediri, an area outside the busy tourist regions of Bali. He had taken over his father’s vanilla plants when Gustu was facing unemployment during the COVID-19 pandemic. His father had started growing vanilla in the 1990s, cultivating vanilla plants he had initially found in the forest. 

Today, Gustu owns around 10.000 plants producing up to 2 tonnes of planifolia vanilla every year (pre hydration). As he told us, the production can vary every year depending on the weather conditions. A vanilla bean takes around 8-9 months to grow and needs to be picked while still green. Otherwise, the risk of the bean splitting is too high, which would diminish the bean’s quality.

Vanilla plantation in Bali

Traditional Balinese Vanilla Production 

In Bali, the vanilla harvest starts in June and ends in September. When we were visiting in December, we could already see new beans grow. Unfortunately we missed the vanilla flowers, as I would have loved to see their pollination. Pollination needs to be done by hand to ensure it’s done correctly and vanilla will grow. From what Gustu had told us, natural pollination would only be 20-30% effective compared to around 95% if done by hand. Crazy, right?!

When I asked about the use of chemicals or pesticides, Gustu gave me two reasons why he doesn’t use them. Firstly, they do make the vanilla plant grow faster, but it also means that it will be less productive faster. Traditionally, a new vanilla plant takes around 2-2,5 years to grow until it develops the first flowers. So it takes quite a while and some good care until it generates income. Secondly, he told me that the prices for pesticides are simply to high given his production quantity.

Steps post harvest

      1. Once the vanilla is harvested, the green beans will be washed and “cooked” in hot water for around 3 minutes. This stops the ripening of the bean.
      2. Afterwards, the beans are kept in a warm box for two days, where fermentation changes the bean’s colour from green to brown.
      3. The next step is to dry the vanilla in the sun, usually from 9 am to around noon for one month and twenty days. Yes, Gustu was really specific about that. Afterwards, the beans are kept in a container and laid out into the sun again the next day.
      4. During this phase the vanilla develops their aromas and the vanillin, which is mostly responsible for their taste.
      5. Once this procedure is over, the vanilla beans are sorted by length and colour, weighed and packaged.

    Vanilla bean cut open

    Selling vanilla as a traditional farmer

    Honestly, I had thought that it must be pretty easy to sell vanilla. It is one of my favourite spices and I know how thought after and expensive it is to buy. From what Gustu told me of his experience is that selling vanilla in Indonesia is almost impossible. It is not a spice that is traditionally used in Indonesian or Balinese cooking. Therefore, he almost entirely relies on exportation. He exports his vanilla to different countries around the globe, mostly bakers like me or perfume makers.

    A meeting beyond vanilla

    Learning first hand from someone who spends his entire day committed to the production of vanilla was inspiring. Not only did I learn so much more about vanilla, but I truly enjoyed meeting and talking to Gustu. He shared his knowledge without hesitation, was curious about my experience about what to do with used vanilla beans and answered all our questions with patience. Of course, I had to get some of his vanilla and ended up getting some Tahitian vanilla on top. I can’t wait to experiment with it, don’t worry, I’ll share some delicious vanilla recipes with you!

    Now I understand better, why vanilla is one of the most expensive spices out there. In case you head to Bali and want to experience Gustu’s vanilla plantation yourself, you can simply contact him on WhatsApp: +62 878 4614 0160 and he will be happy to chat and show you around! You can even get Nasi Goreng after at their family’s local Warung to make the day even more perfect.

    Visiting a vanilla farmer in Bali
    0 FacebookTwitterPinterestThreadsBlueskyEmail
    Gluten-free Fraisier
    French Pastry RecipesGluten-free

    Irresistible gluten-free Strawberry Cake or French Fraisier

    by Jasmin August 26, 2023
    written by Jasmin

    Hello, lovely bakers! Today, I’m super excited to walk you through a gorgeous treat straight from France but with a thoughtful twist—it’s completely gluten-free! It’s the exquisite Fraisier cake, and my version ensures that no one has to skip dessert!

    Why gluten-free? Simply because everyone deserves a slice of heavenly cake! Plus, who doesn’t love a challenge? Let’s dive into making this culinary delight accessible to all!

    Gluten-free Fraisier cake

    Embracing the art of French pâtisserie in a gluten-free form has never been more delicious! This Fraisier cake is sure to impress with its layers of airy sponge, light diplomat cream made out of pastry cream and whipped cream, strawberry compote and the fresh zing of strawberries. 

    It is inspired by Aurélien Cohen, a pastry chef running a beautiful pastry shop and chocolaterie on the outskirts of Paris. During my pastry studies in France, I got to intern there during “Fraisier-Season”. But this version makes sure its perfect for any occasion and also for all those who can’t have gluten.

    Watch my video for all my extra tips!

    While I always try to explain as understandable as possible, it’s sometimes easier to watch a video. Hit the button below to check out how to make this wonderful gluten-free strawberry fraisier!

    How to make this gluten-free strawberry cake

    Sponge Cake (16 cm or 6”)

    • 120 g or 2 large eggs
    • 70 g sugar
    • 70 g corn starch

    Mastering a nice sponge cake might seem tricky but once you’ve mastered it you’ll see that it’s actually really easy! The key to success is time and patience. The most important step is to allow your eggs the time they need to triple in volume and get nice and fluffy. This takes around 5 to 7 minutes, so be prepared for that if you’re using a hand mixer!

    There are some steps to follow for a beautiful sponge cake:

    1. Add the eggs into the bowl of a stand mixer or a regular mixer if you’re using a hand mixer. Also add the sugar.
    2. Mix using a whisk attachment until it has visibly tripled in volume. This will take 5-7 minutes. You can also beat it for longer, you can’t go wrong here!
    3. Sift in the corn starch. Now be nice and gentle. Using a dough scraper, fold the corn starch into the egg-sugar mixture. You want it to remain as fluffy as possible!
    4. Pour into a 16 cm or 6” baking ring or baking pan and bake immediately for 25 minutes at 160°C/320°F.
    Why is it important to beat the eggs for so long?

    This recipe only consists of three ingredients: eggs, sugar and corn starch. Only the eggs can make your cake rise as there is no baking powder in it. This is why we want them to get as voluminous as possible from the start!

    Can’t I just add baking powder?

    There is no need for baking powder. This recipe is so great because it is simple, so why make things more complicated than necessary?

    I don’t have a dough scraper. Can I add the corn starch using an electric mixer?

    Unfortunately, the electric mixer is so powerful that it will lead to your eggs sinking when you work the corn starch into them. This will make the dough flatter when baked. If you don’t have a dough scraper, you can use a wooden spoon or even a regular spoon.

    Can I bake my prepared dough later?

    The longer the dough sits, the more it will sink. But we want to keep as much air in it as possible, so you should bake your dough straight away!

    Diplomat Cream

    This cream is my absolute favourite inside a fraisier! It is light and airy with a hint of vanilla. Just perfect!

    • 400 g milk
    • 1 vanilla bean
    • 65 g egg yolk
    • 65 g sugar
    • 35 g corn starch
    • 6.5 g gelatine powder + 39 g water
    • 200 g whipping cream

    Fun fact! Did you know that some of the most classic French pastry fillings are based off the same base?! This base is called pastry cream or Crème Pâtissière in French. For example, to turn it into a Crème Mousseline, you first do a Pastry Cream and then add butter to it. Or to turn it into a Diplomat Cream, you add whipping cream. Here, I will show you how to make a beautiful fluffy Diplomat cream!

    We will start by making the pastry cream. For this, pour the milk in a saucepan. Remove the seeds of one vanilla bean and add it into the milk. Put in the empty vanilla bean as well. Now infuse the milk for 15 minutes, by bringing the milk to a simmer, then switching the stove off and then covering the top with cling film.

    In the meantime, put the egg yolk and the sugar in a bowl. Mix with a whisk until the colour has lightened and you have a soft yellow tone. Then add in the corn starch and give it another stir.

    Remove the cling film and heat up the milk. Then, pour around 1/3 of the milk over the egg yolk mix. Stir well and put everything back into the saucepan. Place it onto the stove and bring everything to a boil. Make sure your stove is at low to medium heat as we do not want our cream to burn. Now continue boiling your pastry cream for around 2 minutes. Keep stirring with a whisk continuously.

    Off the heat, incorporate the gelatine mass. Then, add in the butter. Mix well and make sure that there are not more butter lumps inside the cream. After, place the pastry cream in a baking dish or a container and cover the surface with cling film. Refrigerate until it’s completely cooled down.

    Then, once your pastry cream is entirely cold and you are ready to assemble the cake, take it out of the fridge. Using a hand mixer, mix it until it’s homogenous and smooth. Whip the whipping cream to soft peaks. Add in one third of your slightly whipped cream. With a whisk, incorporate the cream energetically.

    Add the second third of the cream and now change to using a dough scraper. Gently fold in the cream. If your cream is whipped to soft peaks, it will be very easy to incorporate without losing a lot of air.
    Continue in the same way with the last third of your cream.

    Strawberry Compote

    • 300 g fresh strawberries
    • 30 g sugar
    • 8 g pectin NH
    • 16 g lemon juice

    Now this step is pretty easy: Cut the strawberries into halves and place them in a saucepan.

    Together with the lemon juice, slightly heat up the strawberries. Then add in the Pectin-sugar mix and bring to a boil. Place inside a bowl and let it cool down entirely.

    Later on, you can either leave it as it is if you want to have strawberry chunks in your cake. If you want it to be smooth the way I showed in the video, you can mix it using a hand blender.

    Gluten-free Fraisier cake from above

    Did this recipe make your heart sing? Share your creations, thoughts, and questions in the comments below! 

    0 FacebookTwitterPinterestThreadsBlueskyEmail
    Gluten-free strawberry tart
    French Pastry RecipesGluten-free

    Gluten-free strawberry tart recipe

    by Jasmin August 26, 2023
    written by Jasmin

    One of the most satisfying things I’ve learned in gluten-free baking is how to create a perfect tart. This gluten-free strawberry tart captures the essence of summer with its crisp, buttery crust, sweet-tart strawberries, and creamy almond filling. It’s more than just a dessert—it’s a celebration of fresh, seasonal flavours. Whether for a special occasion or simply a treat with tea, this tart is sure to impress, and best of all, it’s gluten-free so everyone can enjoy it!

    Gluten-free strawberry tart

    Why you’ll love this gluten-free strawberry tart

    This tart is not only beautiful but also delicious. The crisp crust, rich almond cream, and juicy strawberries make every bite a treat. Plus, this gluten-free strawberry tart is simple enough for beginners, making it a great go-to dessert celebrate summer.

    Let’s take a closer look

    • Pâte Sucrée: Rice flour, cornstarch, icing sugar, butter, egg.

    • Almond Cream: Butter, sugar, almond powder, egg.

    • Whipped White Chocolate Ganache: 35% Cream, vanilla bean, white couverture chocolate.

    • Strawberry Compotée: Strawberries, sugar, water.

    • Decoration: Whipped ganache and fresh strawberries.

    Slice of gluten-free strawberry tart

    How to make this beautiful tart step-by-step

    1. Prepare the Crust: Combine rice flour, cornstarch, and icing sugar. Add butter until sandy, then mix in the egg. Form the dough, chill, roll out, and place in a tart pan.
    2. Vanilla whipped Ganache: Heat a part of the cream and flavour it using real vanilla, pour it over the white chocolate to melt it. Add the remaining cream and mix.
    3. Make the Almond Cream: Mix softened butter with sugar, add egg and almond powder. Spread into the tart shell and bake.
    4. Strawberry Compotée: Cook strawberries with sugar and water until thickened. Spread over the baked tart.
    5. Finish and Decorate: Pipe the whipped ganache around your tart and top the middle with fresh strawberries.

    Tips for the Perfect Gluten-Free Strawberry Tart

    • Chill the Dough: This prevents shrinking and ensures a crisp crust.
    • Use Fresh Strawberries: They add the best flavour and texture.

    This gluten-free strawberry tart recipe is perfect for showcasing fresh, seasonal ingredients. Whether you’re gluten-sensitive or simply love strawberries, this tart will surely impress. Enjoy baking!

    Gluten-free strawberry tart from above

    Gluten-free strawberry tart

    Print Recipe
    Cuisine French

    Ingredients
     

    Pâte sucrée

    • 100 g rice flour
    • 50 g cornstarch
    • 40 g icing sugar
    • 1 egg
    • 60 g butter
    • 20 g egg yolk for egg wash
    • 5 g cream for egg wash

    Whipped white chocolate ganache

    • 50 g cream (1) min 35% fat
    • 1 vanilla bean
    • 60 g white chocolate couverture
    • 90 g cream (2) min 35% fat

    Almond cream

    • 30 g butter
    • 30 g sugar
    • 30 g almond powder
    • 30 g egg

    Strawberry compotée

    • 300 g strawberries frozen or fresh
    • 50 g sugar
    • 30 g water

    Decoration

    • 200 g strawberries fresh

    Instructions
     

    Pâte sucrée

    • Sift the rice flour, cornstarch and icing sugar into a mixing bowl.
    • Cut the butter into small cubes and add it to the dry ingredients. With your hands or a mixer, combine until you get a texture that resembles sand. The smaller the butter pieces, the better.
    • Add the egg to the mixture and mix it until the dough starts to come together.
    • Transfer the dough onto your work bench and gently knead it until it forms a smooth and homogenous ball.
    • Flatten the dough into a disc, warp it in plastic wrap and place it in your refrigerator for at least 30 minutes.
    • Once your dough is chilled, place it onto your slightly floured work bench and roll it. Place it in a 16cm tart form. Put it back into the refrigerator or freezer for another 30 minutes. The dough should be as cold before baking.

    Whipped white chocolate ganache

    • Pour the cream (1) into a pot, add the vanilla and heat the cream. Once it's hot, switch off the stove and let the vanilla infuse for 25 minutes.
    • Then, melt the chocolate in the microwave or in a Bain Marie.
    • Remove the vanilla bean from your cream and heat it top again. Once it's boiling, pour ⅓ of your cream over your melted chocolate. Use a rubber spatula to emulsify the chocolate and the cream.
    • Add another third and combine with the cream. Lastly, add the last third.
    • If you have a blender, it is recommended to mix your ganache.
    • Add the cream (2) and mix again. Pour into a flat container and place in your refrigerator over night or for at least a couple of hours.

    Almond cream

    • Slightly warm up the butter, so that it is soft but not melted.
    • Add the sugar and combine well.
    • Add a little bit of the egg to your butter/sugar mixture.
    • Then, with a rubber spatula, incorporate the almond powder. Try to keep the mixing to a minimum, so that the almond cream does not rise too much while baking.
    • Then, add little by little the remaining egg. Place in your chilled tartlet shell and bake together at 155°C for 15 minutes. During that time, prepare the egg wash by combining egg yolks and cream. Remove from the oven, apply the egg wash and bake for another 10 minutes until your tartlet has a beautiful golden colour.

    Stawberry Compotée

    • Cut the strawberries into pieces. Place in a pot, add the sugar and water and bring to a boil. Cook until slightly geliftet. Place in a bowl, cover with plastic wrap (should be touching the compote) and set aside.

    Assembly

    • Fill the tart with strawberry compote until the rim. Even the surface with an offset spatula.
    • Take the chilled vanilla whipped ganache out of the fridge until it is fluffy and pipeable.
    • Fill a piping bag with a #125 tip with the whipped ganache. Pipe several layers on the outside of the tart for it to resemble a flower.
    • Cut the remaining strawberries into smaller pieces and place them in the middle of the tart.
    • Enjoy this gluten-free treat!
    Keyword gluten-free, strawberry tart
    0 FacebookTwitterPinterestThreadsBlueskyEmail
    Uncategorized

    My first days working in a French Bakery!

    by Jasmin April 30, 2023
    written by Jasmin

    And my very first experiences working in a professional environment

    Okay, great! I just scheduled my first blog post to be published next Sunday (See here!). That is extremely exciting and I want to use that good energy to keep on writing. First I wanted to use it to go running but then I realised that it’s raining outside. So instead I am sitting on my bed, writing these words, breathing in the smell of spring rain, sometimes looking out of the window and staring at the Eiffel Tower in the distance. … Ok I admit that the last part was a lie, but I truly am in Paris right now and if I look outside the window I can see a tower. It’s just a regular church though.

    So, I guess I will not write down my experiences from home baker to French Pastry professional chronologically but rather go with the flow. Or write a post according to what you want to know more about.
    As you figured, I am currently in Paris (more the outskirts than next to the Louvre, but Paris is Paris!) doing an internship. It’s my first time ever working in an actual pâtisserie and I can tell you it is VERY different from baking at home! Today was my third day and honestly I am torn between „I’m slowly getting the hang of it“ and „What am I doing here?!“. This is not at all meant in a bad way, rather just an observation.

    To give you some more context, I am currently doing a French pastry diploma that is supposed to prepare me to bake delicious French pastries autonomously after eight months of studying and learning. Six of these eight months are spent at school and during two months I’m doing two different internships. I am now doing my first one, which is in a beautiful pâtisserie just outside of Paris.

    How is it different from baking at home?

    Well, where to start. Already, you’re not the only one in your kitchen baking, but you’re surrounded by a lot more people. The amount of people around you can vary though. Some pastry shops are run by not even a handful people in total. In my case, we’re maybe four or five in the morning and when the second shift arrives at around noon, we’re twice as many. I heard friends say, that sometimes they’re around 20 at the same time or even more. This is something that might seem obvious but it influences me just as it probably influences everybody. I was so used to just being by myself in my kitchen, having all the time I need, the space I need, doing the recipes I want to do. All of this is different working in a professional environment. In my case, I can ask my colleagues any questions whenever I’m stuck and I never saw anyone roll an eye. After all, they do prefer asking questions over making a mistake and maybe having a cake ruined 😉

    And how is baking at pastry school?

    I’m glad I got to go to school for a while before having this first „real world“ experience. Not only did I learn about hygiene (yep, no finger licking or dough eating) but also how to handle having less space, trying a lot of French recipes that I didn’t know before (some really good ones included!!) and especially: Having and using professional equipment! That is something I really love, like big fridges and freezers, a chamber just to proof your viennoiserie dough (I’m talking croissants!) or a machine that provides you with perfectly tempered chocolate. A dream!
    Well, that dream is a bit different in an actual pastry shop. Seeing the really fancy equipment like the tempered-chocolate-thingy or a system that cuts slices perfectly using a jet of water (called watercut) is rather rare. You always find the basics though, but it might be hard to find a spot in the fridge or freezer since space is limited.

    My experiences in a French bakery

    But then again, school is also really different from my internship experience. Obviously, you need to keep the boat afloat, so there are some times where things get hectic and you need to rush and be fast. And well, on day three I did not entirely know the processes so I made a couple of small mistakes. Part of me wishes I had not made them. But then again, let’s not forget that was day THREE. Like literally day three of me baking in a professional environment, abroad and working with people I have never met before. So another part of me is perfectly fine with having made these mistakes, since now I feel like I will remember them plus I’m here to learn. Also luckily it was not big of an issue, I guess these things happen from time to time (whenever a new intern arrives ha!).

    Looks like this is the main thing I remembered about that day. Let’s switch to something more positive! Generally my internship is going fine, I’m really glad to finally be working in a real French Bakery. I’m sure that I’m learning loads without even realising it and I am just grateful that I get to be here. I’m definitely living one of my dreams right now, though I would change a thing or two if I could.

    I will keep you posted on my adventure of working in a French Bakery! Gotta head to bed now, alarm’s ringing at 5am! 

    Talk to you soon!

    Bisous

    Jasmin

    0 FacebookTwitterPinterestThreadsBlueskyEmail
    Uncategorized

    Welcome to Wildflour Pâtisserie

    by Jasmin April 30, 2023
    written by Jasmin

    A.k.a. my struggles of creating a blog and where I wanna go

    I have been wanting to create this blog for such a long time now. I never really knew where to start or what to write about, what to post, trying to get perfect images and wonderful content fist. I thought, what’s the point of posting, if its not looking good, if I’m not providing the best recipe ever? Those of you who are just as perfectionist might understand. Or everyone who ever spend time on a baking blog that looks so professional you have no idea how people with a full time job and three kids do that.

    It’s easy to forget that a „perfect blog“ (whatever that even means, right?!) is hardly born overnight. People invest a lot of time, usually going one step at a time, building it, learning with every mistake they make, learning with every success. As I said, it took me years to finally launch my blog. And I’m trying to take one step at a time and truth be told, I have no idea what I’m doing. I mean honestly, maybe no one will actually ever find this post because I am simply ignoring all the SEO advice you can find. Which also constantly changes, how great is that. 

    But let’s not loose sight of what I’m trying to tell. Which is probably that I am trying to do my best – to share with you my way, my story of finally learning how to bake professionally, of how I left Germany to move to France to go to pastry school, to finally be able to ask all the questions about doughs and creams and croissants and why you need to use a thermometer for your sugar sirup (who cares if its 118 degrees or 125 degrees??). I would’ve been so happy to read about those experiences myself, read about the happiness, read about the struggles connected with it.

    So that is what I am going to do, share my knowledge and experience with you. I am slowly understanding more of the baking science and the wonderful way of baking like the French do. Hopefully soon, this blog will be alive and filled with beautiful content about my time in France, my first professional experience working in a Pâtisserie in Paris and some recipes I’m currently thinking about. And if you want me to, I will even try to explain why your sugar sirup should be at a certain temperature. 😉

    If you ever feel like reaching out, please do so! You can always contact me on instagram (wildflour__patisserie) or via mail at jasmin@wildflour-patisserie.com. Can’t wait to hear from you!

    Talk to you soon!

    Bisous (the French kiss-greeting)

    Jasmin


    0 FacebookTwitterPinterestThreadsBlueskyEmail
    Load More Posts

    hi! I am Jasmin and I am here to share my knowledge and passion about French Pâtisserie with you. Whether you're just starting out or you want to perfect your creations - I got you. Enjoy the site and happy baking!

    Let’s connect!

    Today is a good day to start!

    Let's connect on Instagram

    Quick links

    French Pastry Recipes

    Tips and Techniques

    Pastry Lab

    About

    Contact

    Data Protection

    Follow Us

    Instagram Pinterest Youtube Email

    ©2024 All Rights Reserved. Designed and Developed by Wildflour Pâtisserie

    Wildflour Pâtisserie
    • French Pastry Recipes
      • Classic
      • Vegan
      • Gluten-free
    • Tips and Techniques
    • Pastry Lab
    • About
    • Contact